
Last Updated on March 26, 2020 by Iryna
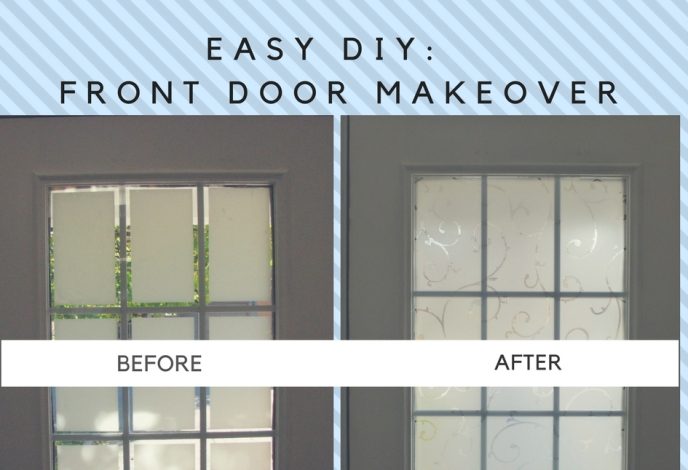
We’ve inherited our main door when we moved to our house more than 7 years ago. It was time for the change, so this DIY main door makeover was long overdue.
The door was probably installed by the builder at the very beginning and never changed by previous owners. As you can see, it had a very simple design but served its purpose.
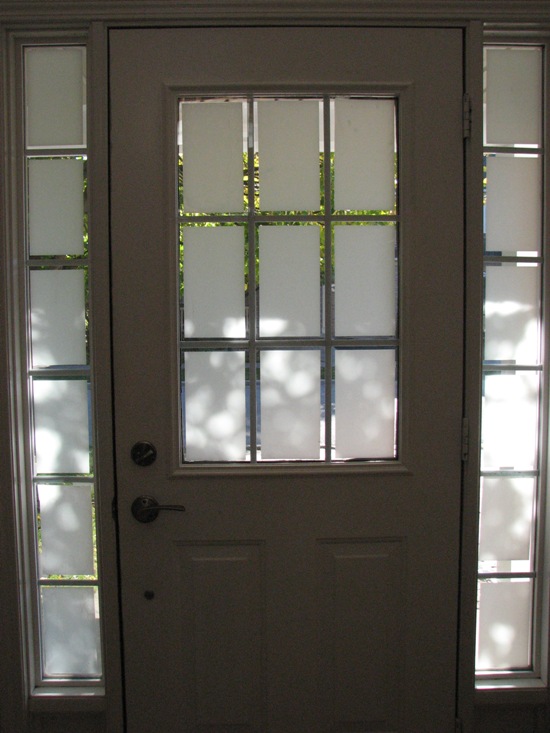
Well, lately, I couldn’t take anymore the look of those misplaced pieces on the sides of the front door, and some changes had to be done immediately.
You see, when my daughter was very little, still a baby, she was exploring the world around her, and one of the interesting, as per her understanding, things to explore was removing those white rectangular design pieces from the glass of the main door.
She was probably doing it quite often, so my husband gave up and fixed it with… yes, clear tape. Now naughty baby couldn’t take them off, ha! But the look was not aesthetic at all.
Sooooooo, finally, the time came to make changes to this weird looking main door design to something more appealing.
This post contains affiliate links, which means if you make a purchase, I will receive a small commission at no extra cost to you. For more information, please see my terms of use.

As we don’t have plans in our budget for now for the whole main door replacement (I know, it’s pricey!), I’ve got an idea to change the white film pieces. It will give a totally new look to the door, and make me happy for some time.
You don’t need much for this simple design idea, and it can be simply done within an hour.
You will need
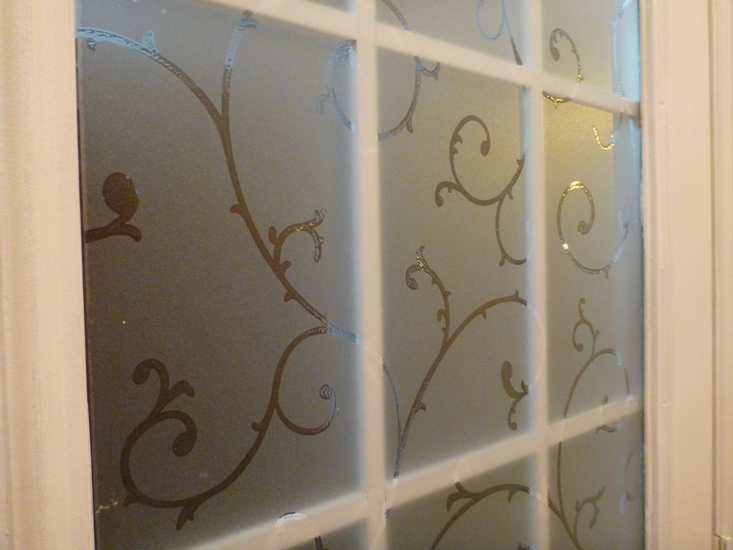
Window film with a design you want. I’ve picked the same design for the glass in the middle of the door and on the sides.

You can have one design for the whole door, same as me, or have different designs in the middle and on the sides of the door. There is honestly no limit to your imagination.
There are lots of design options available, pick the one you like most. I’ve used Etched Lace Window Film by Artscape for my DIY project.
I had to buy two rolls of the window film for our door. They come in different sizes, so make all the measurements before buying to ensure you have enough material.
H2O (water) in a spray bottle
Ruler and pencil
Cutting board or some hard surface to use for cutting
There is also a squeegee required, but you may get in the package with your window film, the same as I did, and it was very convenient to use.
Steps for DIY Main Door Makeover
1. Measure your glass area on the door.
Mark necessary pieces using pencil and ruler and cut with cutting knife. Make some notes on the back of your film pieces for the areas to easily locate them after cutting.
In my old design, I had separate rectangular pieces. My new design was a whole piece unless I didn’t have enough film and I had to combine two pieces.
Make sure to place some kitchen board under the film before cutting, don’t do it on your furniture or floor.
2. Remove the old screen, clean the window.
3. Spray glass with the water, peel the paperback of your film and place prepared pieces of film on the door where they belong. Squeeze extra water with the squeegee.
Enjoy your new main door design! I really love mine!
I hope you found this DIY instruction easy and helpful. If you liked it – you are welcome to share on Social Media or your blog, but please, always give a credit to the author by placing a link to this post. Thank you!
Shop for your DIY Main Door Makeover


Leave a Comment