Last Updated on August 18, 2020 by Iryna
My reason to start a blog was to inspire and motivate people by changes I implement in my life – change in career, place of living, myself as a person. I wanted to bring some value and share my experience.
Very often I would find myself explaining the same thing over and over to different people. And I thought: “Hmmm… that would be much easier if I would just make a post on my blog and share the link with people”.
Blogs are very popular nowadays. No wonder! Blogging is a great way to connect to your audience, share your ideas and create something unique and valuable.
It is also a great creative outlet for some people. I always get excited when I hit “Publish”. It feels like I am doing something meaningful, I am capable of creating something.
Thanks to blogging, I was able to make some changes in my life by implementing my 6 weeks abs challenge. Even more, it helped other people to experience changes while participating in this challenge. It’s amazing to see such an impact!
And it’s not that hard to start a blog!
This post contains affiliate links, which means if you make a purchase, I will receive a small commission at no extra cost to you. For more information, please see my terms of use.
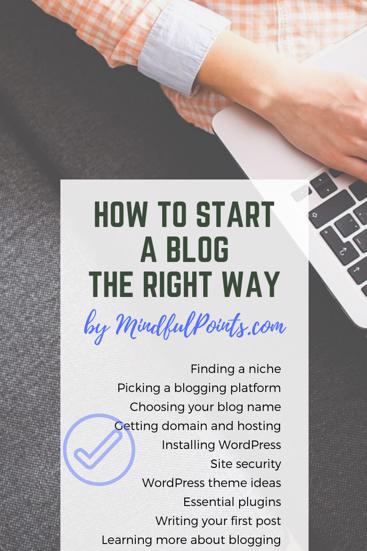
How to Start a Blog
 First of all, you need to decide what you want to write about and who will be your audience. You need to choose a niche. Usually, it’s something you are passionate about or care about, your specialty or professional field.
The best performing content is the one that educates, inspire or entertains. I’ve picked the niche mostly to inspire and educate my readers.
As a practice, try to come up with at least 20 blog post ideas. For new blogs, it is recommended to blog as often as possible at the beginning, at least 1-2 times a week. So you need to have enough ideas to pick the interest of your audience.
Pick a Blogging Platform
There is a choice of various platforms right now. Take your time to learn about them and choose the one that will suit your goals most.
Some of them are free to use – wix, WordPress.com, Blogger. There is no investment required to start blogging on those platforms. It’s customizable and easy to start a blog right away with pre-made designs, like on wix.
However, in the free version, you may have ads placed on your blog. Your website name will include the name of the platform, for example, username.wix.com/sitename.
To remove ads and get a customizable domain name on wix, you’ll need to upgrade to the premium account. Also, WordPress.com allows very limited monetization of your blog.
If you decide to start from some free platform and then move to a self-hosted website on WordPress.org, it will require some time and/or investment. Take this into consideration.
It’s your choice, but I recommend using WordPress.org from the very beginning, where you owe your website and have full control of it.
You will need to buy a domain name and hosting for this purpose. It’s not that big of an investment, but you get a nice and clear website name, can place ads where you want and monetize your blog in a way you wish.
If you want to have full ownership of your blog, then you definitely need to locate your blog on WordPress.org using your own domain name and hosting. That’s not that big of an investment that gives you peace of mind.
Choose Your Blog Name
Next, let’s think about your domain name. Honestly, that was the hardest part for me!
It took me 2 months to come up with the name for this blog. And before that, I’ve bought a domain name and had to change it shortly, as I was not happy with the name. Luckily, Bluehost helped me to switch to a new domain free of charge during the first 30 days of purchase.
You need to be sure you like your web site’s name and that it feels connected to the niche you picked. Also, it needs to be easy to remember, preferably without numbers or unusual pronunciations.
Google the domain name you picked and check the results. You don’t want it to be associated with some other contrary content or have a double meaning in some countries.
Sometimes people use their first and last name as a domain name. It may work if you plan to develop your name into a brand. Also, if you decide to switch the niche another day, your website will be totally fine.
There are some online tools to help you find your perfect blog name. They are called domain name generator. You need to enter a few keywords, your hobbies or interest, and you will be offered some ideas to choose from.
Those sites didn’t help me much, but it was a good exercise to brainstorm ideas. In the end, I was happy with my blog name after such a long time of searching.
While picking your domain name, you want to make sure the Social Media accounts you plan to use for your blog are available. You can check this here.
Once you decide on your blog name, create Social Media accounts as early as possible. You may not use them right away, but you need to create them once the social media handles you like are still available.
Purchase Domain Name and Hosting
After you’ve finally decided on your blog name (YAY!), time to buy the domain. Don’t postpone that decision. Your perfect blog name can disappear if someone else buys it before you.
I’ve bought my first domain name and hosting through Bluehost. They have good customer service, chat option. When I’ve decided to change my domain name to the other one I liked more, I was able to do so within the first 30 days of purchase at no extra charge.
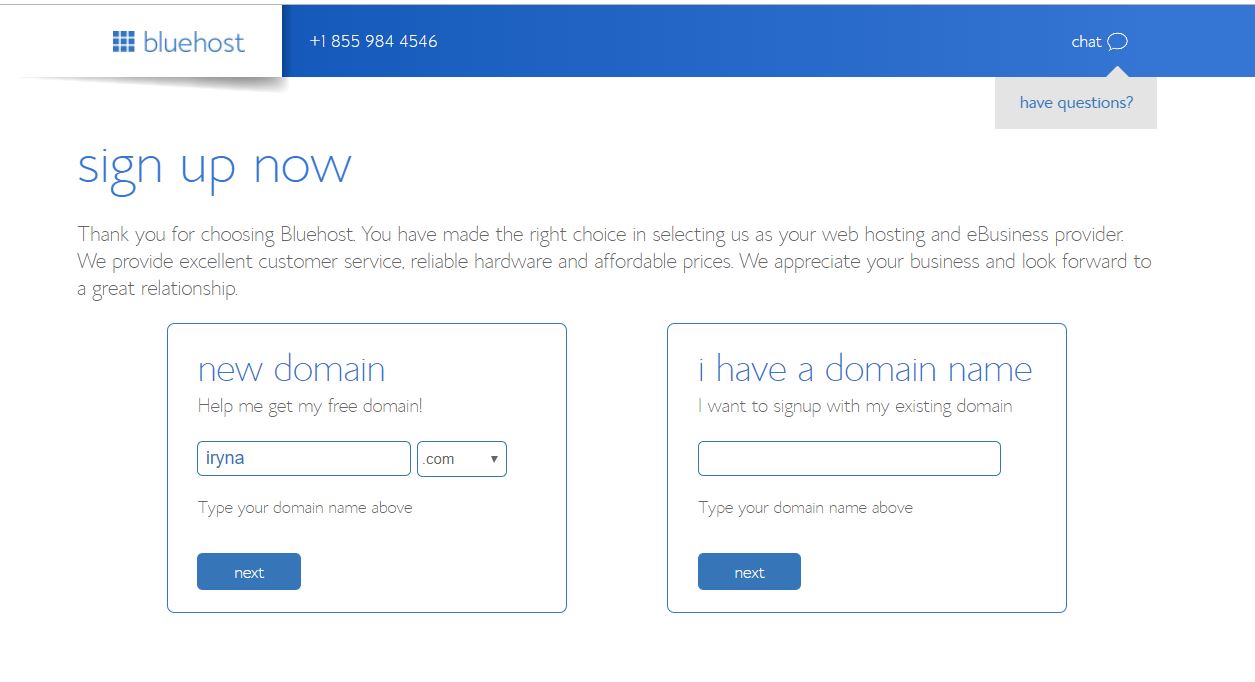
My first domain name and hosting were purchased from the same company – Bluehost. In order to do so, you need to go to Bluehost and click the green button “Get Started Now”.
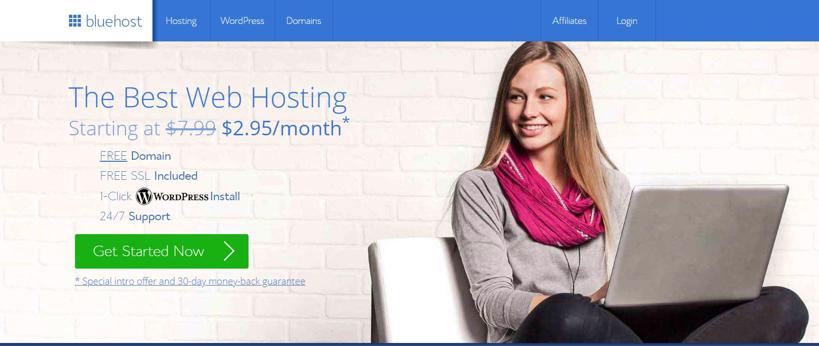
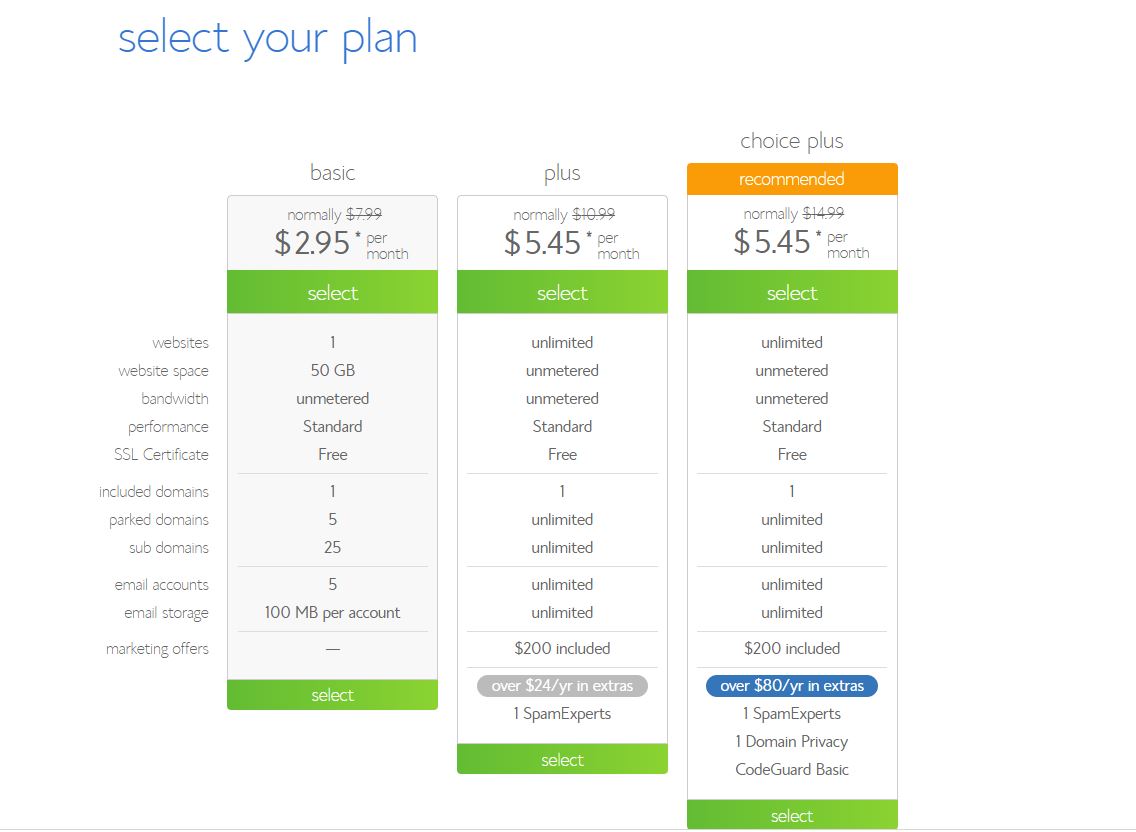
Chose the plan that suits your needs most. If you pick the basic one, same as I did, you can always upgrade later. After I’ve purchased my other domains, I’ve contacted Bluehost and moved to the “plus” package with the option to have hosting for the unlimited number of domains.
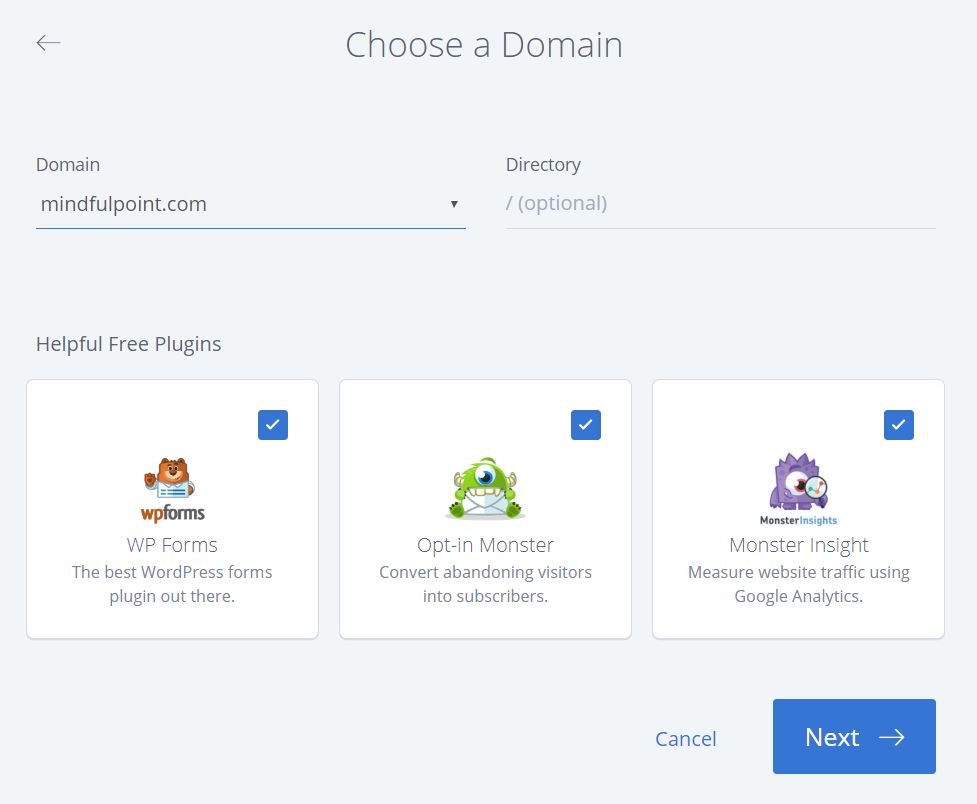
In the next screen, provide the domain name you’ve picked on Bluehost or bought from another provider. I’ll go through the details on how to connect your domain to your hosting provider if they were bought at two different places. It’s quite easy.
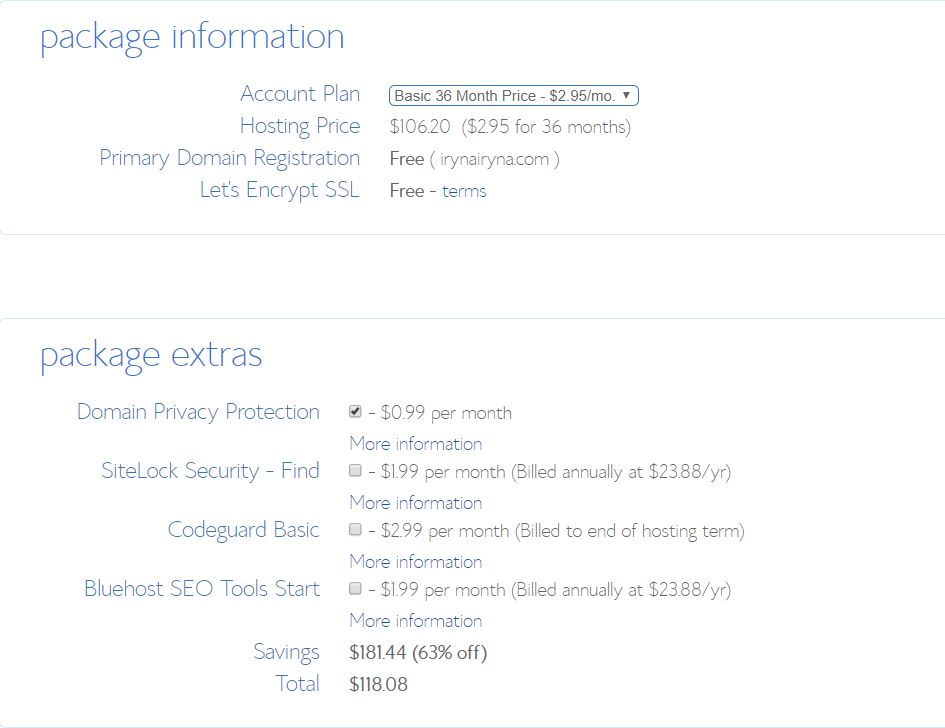
Next, you’ll need to enter your account details and to choose the hosting plan. I personally picked the 3-year plan, as the prices were the cheapest for this option. If you are not sure yet about all this blogging thing, just pick 12 months for the beginning.
Don’t worry about the package extras for now. The only one I would advise considering is Domain Privacy Protection.
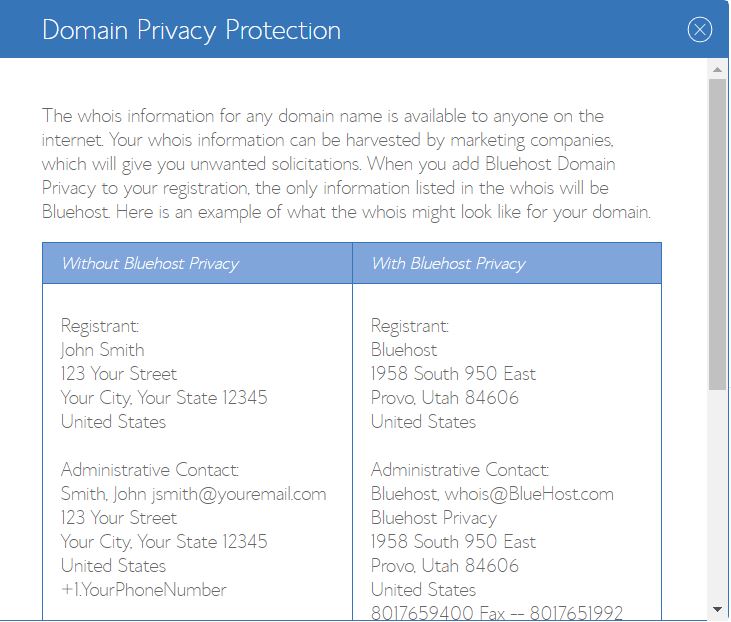
When you register a domain under your name, your contact information gets available online on whois registrar. This is the database of all the registered domains, including the address and the phone number of the owner.
To avoid unwanted solicitations, you can add Domain Privacy Protection, and there will be contact information of your domain provider instead of yours. Would you like to have your address and a phone number known to the world? I doubt so…
First, I didn’t have this feature on and got lots of e-mails offering different website-related services, and other spam. Once I’ve acquired the Domain Privacy Protection, it became peaceful and quiet.
Finish the application form with the payment and your new password. Your website and your new password is the login information for the Bluehost dashboard.
Attach Domain Name to Hosting
After purchasing my first domain from Bluehost, I’ve decided to create a website for my small gig. I’ve shopped around and found that the price for the Domain Privacy Protection at Namecheap (they call it WhoisGuard there) is cheaper than at Bluehost. Price for the domain itself was very similar though.

Some people recommend to have domains and hosting purchased from the different providers for the security purpose. If something happens, you will not lose everything, but at least some part of your stuff.
If you’ve bought your domain from Namecheap or another provider, you need to attach it to the hosting from Bluehost.
For this purpose, log in to your Namecheap dashboard, choose the domain name and click “Manage”.
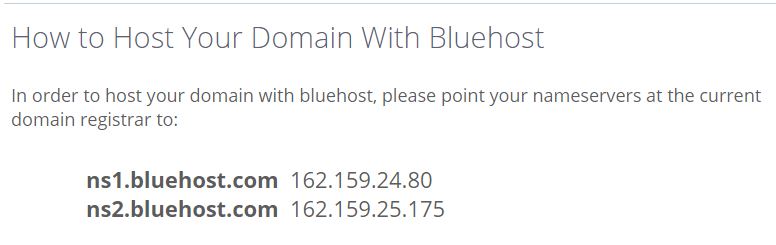
Next, find the “Nameservers” tag and choose “Custom DNS” from the list. Copy and paste the following nameservers for Bluehost:
NS1.BLUEHOST.COM
NS2.BLUEHOST.COM
Don’t forget to click the checkmark on your right to save your settings.

The second part of this procedure requires you to log in to your Bluehost hosting account.
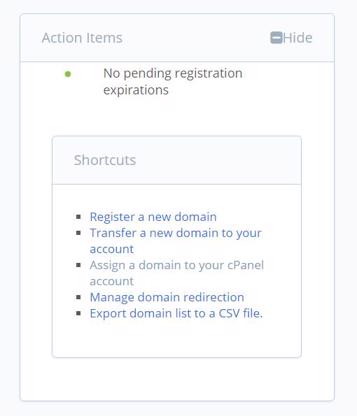 Click the Domains tab on the left and find the “Assign a domain to your cPanel account” under the Action items.
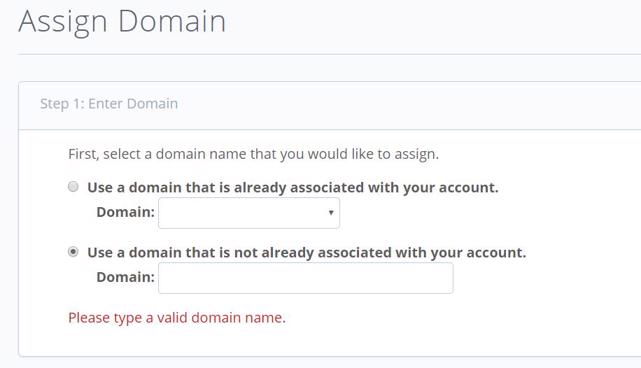
Fill out the required information and then click the green button at the very end “Assign this domain”.
It may take up to 48 hours to update DNS server. If everything is done correctly, you will see your domain listed on the dashboard of Bluehost very soon.
Install WordPress
WordPress is a free and open-source content management system (CMS). It’s a website platform where you can design your blog, create content, reply to the comments and more.
Here are the steps to install free WordPress CMS on your website:
- Once you’ve got your Bluehost hosting, log in to your Bluehost cPanel.
- On the left side, find “My sites” or “Website” section with W in the round icon (WordPress logo) and click “Install WordPress”.
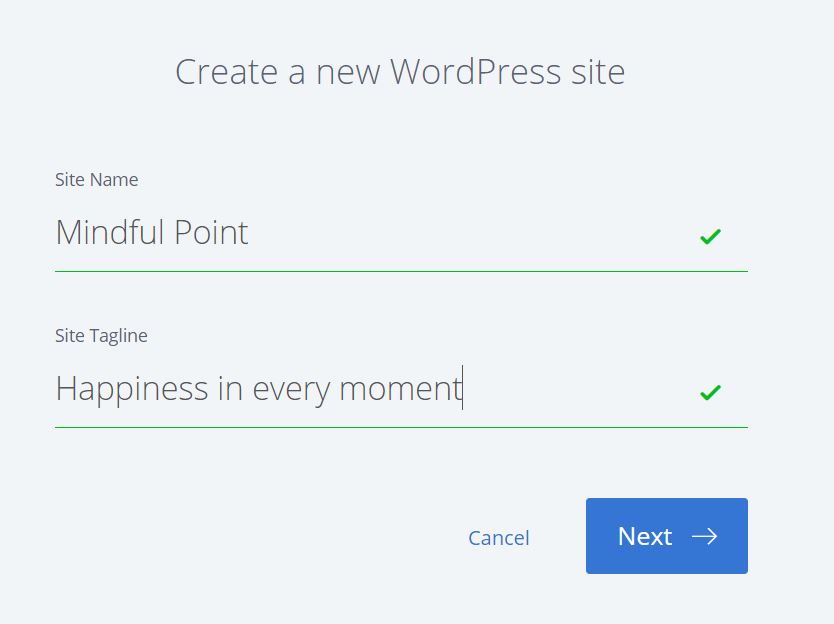
- Chose the domain name where you want it to install to. Don’t forget to use your main keywords in the site’s Tagline.
4. Click “advanced options” to change/create the e-mail address, username, and password. Those are totally different credentials from your Bluehost log in. You will need this information to log in to your website.
5. Go through the service agreements, check the box for your agreement, then click”Install Now”.
Bluehost has detailed instructions on WordPress installation as well.
To log in to your new website, you will need to use the following link: http://yoursitename.com/wp-admin. Enter your username and password, and you are good to start creating!
Choose WordPress Theme
Now it’s time for you to think about the design and look and feel of your blog. Probably you saw already some blogs or websites you really liked. You can use a free tool, called WP Theme Detector, to check the WordPress theme other people use on their blogs.
There are some free themes available, and there are premium themes, where you make a one-time payment. Both of them involve some learning curve of the WordPress dashboard and functions.
The difference between free and premium themes is that you may have more functionality when you buy a premium one. It may have a more professional look, more advanced features and built-in options.
Besides, technical support is included with the premium theme. And that’s really convenient to be able to ask someone technical questions about your theme. Usually, they give you 1 year of support, but make sure to check first before buying the theme.
You can always switch between themes, between your designs. If you are unhappy with the current look and functionality of your blog, consider investing in a premium theme, it makes a big difference.
I always check for ratings and reviews of the theme I want to install. There is a demo available, so you can explore and click around. To install or change your theme, go to Appearance -> Themes on your site’s dashboard.

You will see tabs for premium themes or WordPress.org themes, meaning free. If you’ve purchased and saved on your computer a premium theme already, you will need to click “Upload”.
Free WordPress themes I used and liked: Virtue, Shamrock. You want to make sure your theme is responsive, meaning it can be viewed on different devices like mobile phones, ipads etc.
Premium themes I like and would consider for my blog:
Restored 316 – very popular themes, light design, professional and appealing look.
Bluchic – beautiful and simple feminine themes.
Pretty Darn Cute – modern design and features for feminine and travel blogs. Include WordPress and theme customization tutorials.
Feast Design Co – beautiful WordPress themes for food blogs.
If you need more designs and ideas, check out StudioPress themes. They have a big choice for every taste.
Once you made a decision, don’t be afraid to explore your WordPress dashboard and options of your new theme.
Turn On SSL Certificate
You probably noticed some links of websites start with http:// and some with https://. When you visit a blog that starts with http://, Google Chrome gives you a notification in a small window near the site’s link “Not secure”.
![]()
If you click on the information icon of this notice, you’ll read that Google doesn’t recommend to provide sensitive information to this website, such as passwords or credit card information, as it is not secure.
An SSL (Secure Sockets Layer) certificate is a digital certificate that encrypts the information sent to the server and creates a secure link between a website and a visitor’s browser.
It is essential to have a trusted and secure connection if you plan to offer products or services on your blog. Once you have SSL certificate on your blog, your website’s link will start from https://.
Usually hosting provider offers SSL certificate for free. And this is exactly what Bluehost does. It’s really easy and fast to turn your SSL certificate on.
Log in to your Bluehost account. Once on the dashboard, choose “My sites”. When you hover over the image of your website, click the appeared button “Manage”.
You will see different options for your blog. One of the tabs is “Security”.
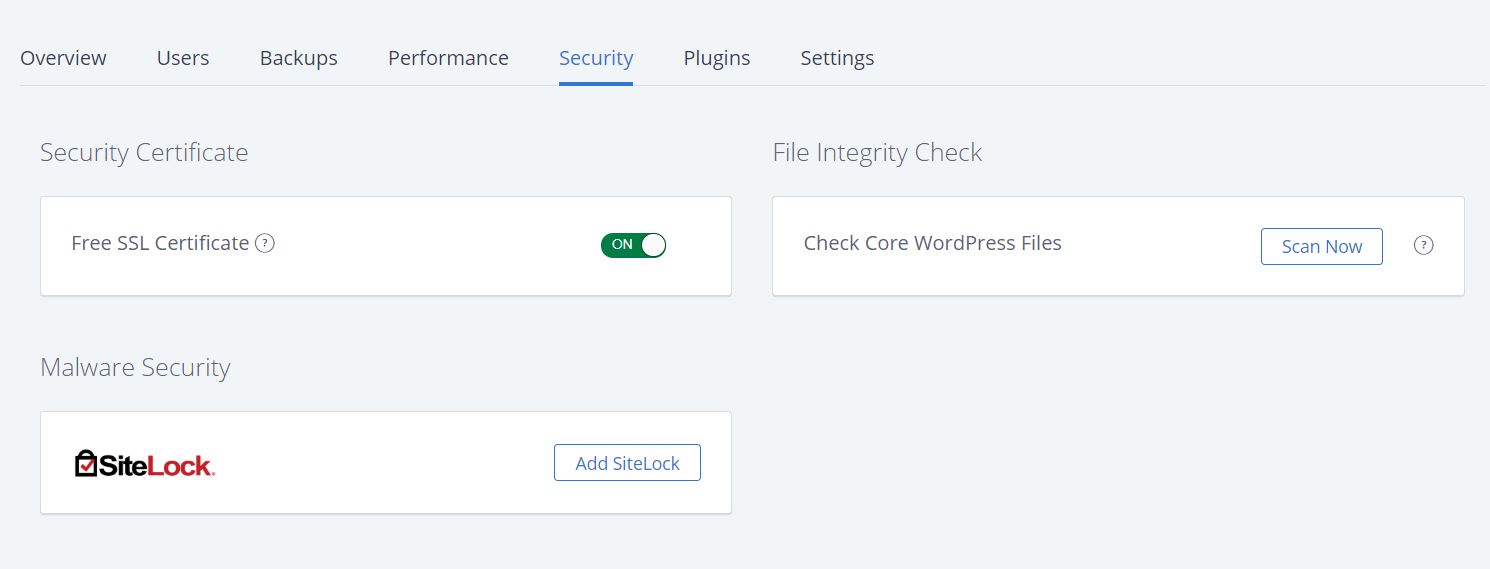
Under this tab, you can switch the SSL certificate on. It will turn into a green indicator. You are good to go! It may take some time for the change to take effect.
Install Plugins
WordPress plugins are small additions that can extend the functionality of your website. For example, if you’d like to have an Instagram feed on your sidebar, or floating Social Share buttons, you can use plugins.
Most of WordPress plugins are free, with some paid options for premium features. But don’t get too excited about that! Too many plugins may slow down your website, and website speed is an important factor in those days. So choose your plugins wisely.
Some premium themes already have a variety of features included, you may not need to install a lot of them. And that’s another beauty of having a premium theme – it makes your website light and fast.
To add a new plugin, go to Plugins -> Add New on your website dashboard. In a search box start typing what you are looking for and chose the right one from the offered list.
I usually look at the star rating, amount of active installations (usage by other websites), date of the last update and compatibility with my version of WordPress. Click the “Install” button. You will be informed once the plugin gets installed.
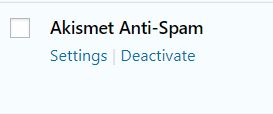
There is one more step required for you to use the plugin. Go to your Plugins -> Installed plugins and activate the one you just installed. You can customize it in the settings area.
You will see some notifications of plugin updates from time to time. The author of the plugin makes some changes and you just need to click the “Update” button to keep it up-to-date.
Here is the list of the essential free WordPress plugins I personally use at my blog and recommend:
Akismet Anti-Spam by Automattic – protects your blog from spam. It usually gets installed automatically.
Bluehost by Mike Hansen – easy integration with the Bluehost control panel. It usually gets installed automatically.
Contact Form 7 by Takayuki Miyoshi – simple but flexible contact form if you plan to use any on your blog.
Insert Headers and Footers by WPBeginner – I use this plugin for Google Analytics integration, Pinterest website confirmation and others. Some applications ask you to place a special code in the header of your website to confirm the ownership, and this is where you’ll need this plugin.
Instagram Feed by Smash Balloon – easy and customizable integration of your Instagram feed.
UpdraftPlus by UpdraftPlus – auto back-up of your blog. I’ve set up weekly back-ups to my Dropbox.
WooCommerce by Automattic – free eCommerce plugin to sell products on your blog. It usually gets installed automatically.
Yoast SEO by Team Yoast – your SEO helper (believe me, you need one!)
Write Your First Blog Post
Now you are all set to start creating! This is always exciting for me – to see the result of my work. Just remember, the more you write, the better your writing becomes. Don’t afraid to hit “Post” for the first time.
Go to Posts -> Add New. Name your first blog post and allow your creative juices to flow. Don’t forget to assign a category for your post – this is like a chapter of the book, where all the information on the same topic belongs to one place.
You can add a new category by going to Posts -> Categories or by clicking “Add New Category” on the right side of your post.
It’s very important not to only write an engaging post, but to have it free from grammatical errors. I use Grammarly to double-check my spelling. They have a free version, and it’s more than enough at the beginning.
Educate Yourself About Blogging
As in every aspect of our life, we could either spend our time and research ourselves on the topic of our interest or get the necessary education for the faster route.
Same in blogging – you can spend hours researching every step in blogging, or you can reach a helping hand from the established blogger and make a small investment in your education.
I personally think that’s the best type of investment we can make – investment in our education. Even if it’s just a flute class (oh my, all that blowing! lol).
For blogging education, I recommend an online course by blogger Cate Rosales from sweetandsimplelife. Cate has more than 10 years of experience in the online marketing field.
Her blogging course covers all the important aspects for bloggers – how to start a blog, build an audience, increase traffic and earn money from your blog. The one thing I like about Cate’s approach is that she recommends treating a blog as a business. Such a different strategy for many bloggers considering it just a hobby.
I personally found lots of new and useful information, even though I am in the Digital Marketing field. This course saved me lots of time and encouraged me to continue my blogging journey.
If you have big plans for your blog, want to take it to the professional level, save time and minimize the number of first bloggers’ mistakes, consider investing in your education. Cate’s blogging course “Becoming a Blogger” is the perfect starting point.
And remember, the most important thing about starting a blog is actually to start it. Do not postpone this decision, today is the day! Blogging world needs you!
Was this information useful? What do you find is the biggest challenge you have in starting a blog? I always love reading your comments! 🙂


26 COMMENTS
Joyce@Celebratemomsforever
8 years agoGreat advice! I agree with starting on WordPress.org right from the beginning. You do have more control over your site.
Iryna
8 years ago AUTHORThanks for your feedback, Joyce! Yes, it’s important to start with the right steps from the very beginning… I wish I knew some of those tips earlier myself, as correcting things does take time!
Steph
8 years agoThis is great advice – I have a small blog and I love it – I am seriously thinking about going self hosted and your post has helped a lot
Iryna
8 years ago AUTHORThank you, Steph! I am glad you’ve enjoyed the tips…
I think you have more creative power when your blog is self-hosted. Good luck with your move! 🙂
Lily @ FindingBalance.Mom
8 years agoSuch a detailed post. I will link to it when people ask for a post on starting a blog for beginners. Apparently my own start a blog post was too advanced and didn’t hit brand new bloggers’ pain points.
Iryna
8 years ago AUTHORI am glad you found it useful, Lily! Yes, I wanted to simplify the life of new bloggers as much as possible 🙂
Ridhwanah
8 years agoGreat Post! I totally agree. It’s best to just jump right in and there’s a TON of information out there on the web from other senior bloggers to help you through the process. Great advice!
Iryna
8 years ago AUTHORThanks for stopping by, Ridhwanah! Yes, education is important and really helpful for new bloggers to save time and avoid common mistakes. I am glad you enjoyed this post 🙂
Charlie | The Barefoot Angel
8 years agoSuch great advice – I definitely didn’t start my blog the ‘right’ way! I started on a free .wordpress.com domain and I will always regret it. It’s so daunting putting up that investment from the beginning when you don’t know whether you’re going to fully commit to it (blogging is such hard work!) but I would always urge anyone looking to get into it, to bite the bullet and go with wordpress.org! Charlie xo
Iryna
8 years ago AUTHORThanks for sharing your experience, Charlie! Sometimes we learn the hard way, unfortunately… I am glad you found some useful information in my post 🙂
Rebecca Jones
8 years agovery wise advice here – thank you.
I was on wordpress.com for over three years and I wish I’d moved to self hosted sooner. I’m just starting to look at a new theme, so I’ll be investigating your suggestions.
Bec 🙂
Iryna
8 years ago AUTHORThanks for your feedback, Bec! I hope you find some good theme on the list I’ve mentioned 🙂
Lara Olivia
8 years agoThis is a fantastic post for anyone starting out. I remember when I started my blog 2 years ago now I didn’t find anything as useful as this and had to learn everything the hard way! I’m interested to hear how you get on with Bluehost. For me, it took an average of 7 seconds to load my website with them no matter what we tried, so I switched to Siteground and never had any issues since.
xo
Iryna
8 years ago AUTHORThanks for your input, Lara. I am glad you’ve enjoyed the post. So far no issues with Bluehost, I am happy with their service and ease of use.
Beth
8 years agoA lot of my clients have questions about hosting when it comes to starting up a blog and I think you’ve explained things quite comprehensively! I’ll definitely bookmark this post as a resource. 🙂
Iryna
8 years ago AUTHORThanks, Beth! Awesome! I am happy to hear you liked it 🙂
kanishka
8 years agoYes I followed a similar procedure. I chose Siteground however. Sometimes the process can be overwhelming it is always good to have a handy guide like this post!
Iryna
8 years ago AUTHORThanks. Yes, technical stuff in blogging is what takes time to figure out, for sure!
Sahar
6 years agoGreat advice , I going to just start …you wrote so detail … as a beginner, do you think I can start now ?? Please share your experience about how did you start ? Thank you
Iryna
6 years ago AUTHORSahar, it’s never late to start! You can follow the steps I’ve mentioned in this blog post. First, you need to determine what you plan to write about and come up with the domain name. Good luck! It’s exciting to see other people starting their blogging journey 🙂
Sahar
6 years agoThank you Iryna , you are amazing and inspiring me ..
Iryna
6 years ago AUTHORAwe, I am glad to hear, thank you for your kind words. Good luck with your blog! I am sure you’ll enjoy it, that’s an exciting journey 🙂
Sindhura
8 years agoAn informative tutorial. Great job!
Iryna
8 years ago AUTHORThanks!
Phaytea’s Pulse
8 years agoVery important steps you’ve mentioned and every newbie blogger needs to read this. Before I went self hosted, I had read a lot about blogging and I put all these steps into consideration. Thanks for writing a detailed post
Iryna
8 years ago AUTHORThanks for your input, Phaytea! Good for you for learning before making your choice. Sometimes it takes more time to change or correct an error 🙂